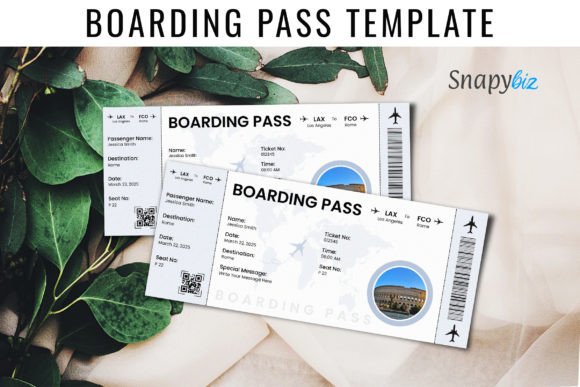
Boarding Pass Canva Templates: Your Ticket to Stylish, Stress-Free Travel Reveals
Gone are the days of fumbling with a crumpled piece of paper or a generic mobile app screen. Whether you're planning a surprise vacation for your partner, organizing a destination wedding, or simply want to add a touch of glamour to your travel journal, the Boarding Pass Canva Template has become an essential tool for modern creators. It transforms a standard piece of travel bureaucracy into a beautiful keepsake or an exciting announcement. However, while the concept seems simple, many users rush into the process only to find their final prints looking amateurish or their digital files failing to load correctly.
If you want to look and feel like a superstar and make a bold statement with your next travel reveal, you need to approach the design process with a bit of strategy. This guide will walk you through how to maximize the potential of these editable templates while avoiding the common pitfalls that trip up even seasoned designers.
Understanding the Power of Editable Digital Designs
At its core, a boarding pass template is a pre-designed layout that mimics the aesthetic of an airline ticket but is fully customizable. The best versions are designed specifically for Canva, the popular web-based design tool. This accessibility is what makes them so appealing. You do not need to be a graphic designer or own expensive software like Adobe Photoshop to create high-quality results. You simply download the template link, open it in Canva, and start editing.
However, a common misunderstanding is viewing these templates as mere replicas of airline tickets. In reality, they serve multiple purposes:
- Gift Reveal Cards: Perfect for hiding the destination of a surprise trip until the very last moment.
- Wedding Invitations: Ideal for destination weddings, giving guests a thematic "ticket" to the event.
- Scrapbooking: Creating a polished memory of a journey taken.
- Event Passes: Adapting the sleek look for VIP access or workshop tickets.
When you choose a professional Canva design, you are buying into a layout that has been tried and tested for smooth journeys ahead. But the quality of that journey depends entirely on how you handle the customization.
The Critical Mistake: Ignoring Print Specifications
The most frequent error users make is focusing solely on the design aesthetics while ignoring the technical specifications of the file. You might create a stunning boarding pass on your screen, only to have it print blurry, cut off, or on the wrong paper size.
When you receive a high-quality Boarding Pass Download, check the description immediately. For example, a standard professional template usually allows you to print three cards on an A4 or US Letter page size, with each individual card measuring 8.5 x 3.5 inches.
The "Bleed" and "Margin" Trap
Beginners often place text or critical design elements too close to the edge of the card. When you cut the paper, you might slice off a name or a date. To avoid this:
- Use the Guides: Canva provides purple guidelines. Keep all vital information inside these lines.
- Check for Bleed: If your template has a colored background that goes to the edge, ensure you are using a template that accounts for "bleed" (the area that gets trimmed off) so you don't end up with a white sliver on the side of your ticket.
Avoiding the "Generic" Look: Customization vs. Clutter
Many users download Editable Templates and simply change the text, leaving the stock imagery or default colors intact. While this is functional, it misses the opportunity to make the design truly yours. Conversely, others go too far in the other direction, cluttering the clean boarding pass aesthetic with too many stickers, fonts, and images.
The goal of a boarding pass design is elegance and clarity. It should look like a Boarding Ticket, not a scrapbook page (unless that is the specific style you bought).
Better Approaches to Customization
When editing your Canva Templates, consider the following practical advice:
- Font Pairing: Stick to two or three fonts maximum. Use a bold, stylized font for the destination and a clean, sans-serif font for the details like dates and times. This ensures the recipient can actually read the important information.
- Color Harmony: If the template is for a tropical vacation, change the color scheme to match the vibe—blues and teals for the ocean, or sunset oranges. Do not just use the default colors if they clash with your photos or the theme of the trip.
- Photo Integration: Some Canva Designs allow for photo inserts. If you use them, ensure the photo is high-resolution. A pixelated photo will ruin the premium feel of the ticket.
Who Are These Templates For?
It is easy to assume these are only for travel agents or jet-setters, but the utility of a Boarding Pass Canva Template extends much further. If you fall into any of these categories, this tool is for you:
- The Romantic Partner: Planning a surprise getaway? A physical boarding pass handed over at dinner is infinitely more romantic than a screenshot of a confirmation email.
- The Event Planner: Hosting a gala, a workshop, or a retreat? The boarding pass format is an excellent way to issue "tickets" that feel substantial and exclusive.
- The Memory Keeper: For scrapbookers and journalers, creating a custom pass for a past trip adds a professional touch to your memory books.
- Small Business Owners: If you run a travel blog or a boutique agency, offering these as downloadable freebies or merchandise can add value to your brand.
Evaluating Quality Before You Buy
Not all Boarding Pass Canva Templates are created equal. The market is flooded with options, but quality varies wildly. Before you make a decision or purchase a download, you need to evaluate the product to ensure it meets professional standards.
Here is what you should check before committing:
- Layer Organization: A messy Canva file is a nightmare to edit. Good templates have groups and layers labeled clearly (e.g., "Editable Text," "Background," "Graphics").
- Commercial License: If you are a business owner using these for clients, ensure the license allows for commercial use.
- Responsiveness: Does the design look good only on screen, or is it optimized for print? Look for templates that specifically mention "print-ready" or provide the correct dimensions (like the 8.5 x 3.5 inch standard).
- Reviews and Previews: Look at the preview images. Do they look realistic? If the preview looks blurry, the actual file likely will be too.
Practical Advice for a Smooth Journey
To ensure your experience with Canva Designs is seamless, remember that the file you receive is usually a link. Do not try to upload it as a JPG or PDF; you must open the link to access the editable version in Canva.
Furthermore, consider the tactile experience if you are printing. A boarding pass printed on standard printer paper feels flimsy and cheap. To elevate the presentation:
- Cardstock is Key: Print on heavy cardstock (at least 80lb or 200gsm). This gives the ticket the stiffness of a real pass.
- Trimming: Use a paper trimmer or a craft knife and a ruler for straight edges. Scissors often leave jagged lines that ruin the professional look.
- Finishing Touches: Consider rounding the corners with a corner punch. This small detail makes a massive difference in mimicking a real boarding pass.
Conclusion: Board in Confidence
The Boarding Pass Canva Template is more than just a digital file; it is a vessel for excitement, anticipation, and professional presentation. By avoiding the common mistakes of poor printing specs, over-cluttering, and low-resolution imagery, you can create something truly special. Whether you are revealing a vacation destination or organizing a high-end event, these editable templates